
Wednesday, December 29, 2010

In Stitches: Embroidery!

Take your needle, my child, and work at your pattern; it will come out a rose by and by. Life is like that; one stitch at a time taken patiently, and the pattern will come out all right, like embroidery.
~Oliver Wendell Holmes
My Embroidery Mosque!

As a child it wasn't uncommon for me to receive an embroidery kit for my birthday. But like most sewing projects given to a child, I never finished them. I do, however, remember on occasion stitching my own picture on cloth, usually rolling hills with a road and the rainbow that seems to make it into most eight year old girls' drawings.

But the most memorable Embroidery experience I had was when I was 15 and going through my flower child phase. My parents announced that we would be taking a road trip to California (Hippie Heaven!) to visit my Aunt and Uncle in San Francisco, so I passed the three day long haul in the back of the car embroidering a pair of my Dad's old jeans I had cut into shorts- with flowers, peace signs, hearts, "love", "Peace" and a John Lennon "Imagine" Sketch on the bum pocket. The more those shorts were worn and torn, the better they looked (from my perspective) and I think at one point they probably dragged themselves off to Paris to be buried next to Jim Morrison in his grave.

And then I pretty much forgot about embroidery as a skill until my instructor announced we would be doing some embroidery next term. So I bought a small arsenal of coloured threads to play with over the Christmas break, because afterall, I've got a pretty good teacher in house- My Mum.

My Mother's intricate and perfect embroidery work.

My mother likes to do Brazilian Embroidery, which is a very intricate and obsessive kind of craft. The threads are wound in such a way that 3D images can be created and the result is often a symphony of beautiful flowers. As mum sat with me one morning with her books and her threads out on her lap, she excitedly showed me how she created some of these things. Perplexed, I had some flashbacks to knitting. Winding threads is obviously not a skill I have mastered! But I did get French knots and bullions down pretty easily so I figured those might come in handy. Thanks, Mum!

More of my mum's work- the pink flowers are made from wrapping a lot of thread around the needle and carefully sliding it onto the main thread, creating a long worm like embroidery structure (For lack of a better term.)

Mum also chastised me for buying cheap cotton thread made in Shanghai. Apparently rayon thread is more slippery and easier to slide into beautiful embroidered structures, but Mum and I have a slightly different colour palette, as you will see!

My first attempt! Not too pretty. The one in the middle is embroidered, and the other two are block prints. I practiced top stitching but decided it was done without finishing, since I already knew how to improve it the second time around.

I decided it would be interesting to do something with Indian henna designs, and since I already have one of my favourite designs in the shape of a block print, I block printed some cheap unbleached cotton to practice on. The first one was a bit of a disaster- the material was too cheap and thin and left a gaping hole wherever the thread went through and pulled a little. I also didn't have clue what I was doing so I began to top stitch the design, leaving a little gap of material between the stitches, but it looked awful. so I stitched back over it and tried to cover up the gaps. Also not a great idea. In the end, I top stitched it to two block prints and saved it in my book as my first embroidery attempt.

My second attempt! I doubled up the material which worked much better. The black dots are french knots and you can see I lack my mother's skill in creating bullions with cotton thread. (The little orange spike coming off the orange tear drops.) Oh well! Practice!

It wasn't wasted time though, because I worked a few things out and the next day, as I recovered from having a tooth pulled, the dog and I spent the day on the couch, her watching me carefully make a stitch and bring the thread up in the middle of the last stitch to create a continuous line. I switched up colours, which is something I obviously can't do when I block print the design. This little design is probably the size of the palm of my hand, and it took me a few hours just to complete this!

My mosque before I embroidered it: Appliqued with shiny rich, Arabic looking taffeta.

Since I had some scraps from my applique blanket project, I next appliqued a mosque with the idea of perhaps one day making this into a pillow, but first it will adorn my textile book. Then I took my new found french knot skills and experimented with some stitches, and put all the fine details on this little mosque.

I played with bringing a stitch through a loop creating a little zig zag pattern. A good way to fill up a space with pattern!

As you can see it's hard for me to embroider in a uniform way, but I like the wonkiness of the stitches.

Embroidery has been around since most people started wearing clothes and realised the little stitches that held the cloth together could also be used for decoration. The Ancient Egyptians, Phoenicians, Babylonians and Hebrews all used Embroidery to embellish their clothes, adding beads, buttons and shells and even bones to the design. A person's wealth was often measured in how much embroidery adorned their clothes. These days, in Africa, The Middle East and India, embroidery is still alive and well, though much of it is machine made these days. I particularly love Suzanis, embroidered pieces meant for a young girl's dowry- widely available in Turkey but most likely produced in one of the "-Stans" (Pakistan, Uzbekistan, Tajikistan etc.)

I took this picture from a sweet little blog post of Suzanis. You can click here to read it and see the picture in it's original post.

After doing a little embroidery, I now understand the amount of finicky work that goes into the process, and if I were so inclined to buy a suzani, I would happily buy one knowing it was worth every cent when looking at the amount of work that goes into one.

But then I look a little further and think, maybe my embroidery career isn't quite over yet! Perhaps I've got a little pillow poking in my future!
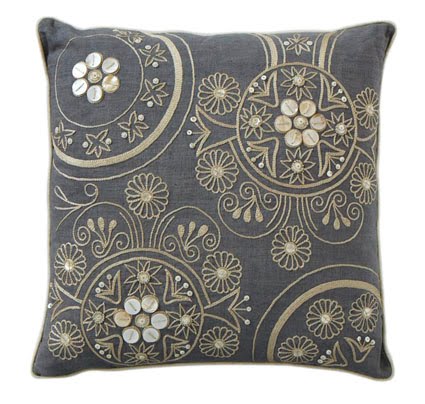
From Lille's Shop! Click here.
xxMelanie

Friday, December 24, 2010

Cut Shape Sew...Applique!

"The only place where housework comes before needlework is in the dictionary".

~Mary Kurtz, "The Needlework Times" April, 1978.

I'm not sure why I chose to learn how to applique before picking up any other form of textile art- perhaps it seems very straight foward yet still creative enough to keep me interested in finishing the projects. My first attempt was in university, and truthfully, it was a complete disaster.

First of all, I decided to sew directly onto an old cheap quilt someone had given me, making my thread disappear quickly and the hand sewing ridiculously hard in areas where I actually lost the needle in the stuffing! Then there was the fact that I chose the materials from the remnant bin at the fabric store so the whole thing couldn't be washed anyways for fear of shrinkage and what not. So I gave it away, much to my mother's lament.

The first applique blanket I ever made. I guestimate it took me about four months to make this one. I will most likely never make another like it! Inspired by Turkish tulips designs.

In fact, she lamented so much, when I moved to Shanghai and visited the Shanghai Fabric Market with friends on the weekends, I got the idea to make blankets in my spare time. The taffeta was beautiful, machine embroidered with gorgeous slightly Asian designs, and not too expensive considering I was buying it in the country where it had been manufactured. My first attempt was an appliqued blanket for my mother, which, took months to complete. I was happy to hear my parents went to Arizona that Christmas, as it gave me an extra month to finish it!

Anyway, a little history of applique. Applique is a technique of sewing one piece of cloth on top of another piece of cloth to create a pattern, as opposed to quilting where the fabric lays side by side. The oldest surviving example of applique is a canopy found in Egypt (surprise!) in 980 BC. Applique comes from the French word "appliquer" which means to "put on" but most likely originated in Asia and travelled to Europe along the Silk Road. Applique was used for decoration but it was also used in patchwork to mend holes in clothing clothing, saddle blankets, ceremonial objects, tents and everyday items. Early symbols used in applique were amulets and symbols protecting the user, family crests and depictions of animals.

Applique is a pretty basic technique and can be found in many cultures:

First Nations Button Blanket. Original Source here.

First Nations Peoples of Canada used applique in clothing and the creation of button blankets, Gujarati Indians in India appliqued their tents and textiles used in ceremonial rituals, royal costumes and umbrellas.

Original Source here.

The Fon tribe of Benin created ceremonial appliques when friends came together at a loved one's funeral and appliqued the story of the deceased's life.

Mola Applique. Original Source here.

The Kuna tribe of Panama created their own style of applique work called "Mola" which was based on body paint designs and created out of multiple layers, fine stitches, cut outs and embroidery.
The backside of the Long Life Blanket.

Since I was living in Shanghai, and the fabrics I bought from the fabric market were Asian in style, I decided to applique Chinese Characters onto the fabric. All I can say is Thank God for fusable hemtape (easily found at any fabric store.). It comes in a gauzy roll of tape which is tucked under the hem and them ironed, where it turns into a kind of glue which holds the fabric together as you sew. It's perfect for applique work and without it, I'm not sure I would have been able to complete these projects as I did.

Double Happiness!

The second blanket I made went to my sister for her birthday, but I liked it so much, I made one for myself! We both love the double happiness symbol, and since it's made up of straight lines it was easy to applique. (Curves are hard to fusable hem tape!) Double happiness is usually reserved for weddings in Taiwan and China, but since I'm not married, I like to think about my sister and I both being happy with our twin blankets!

Long Life!

The next one I tackled was the symbol for long life. This one was a little harder to do because of the curves and the intricacy and symmetry of the character, but with a little work and a few tossed out pieces that weren't perfect, I finally got it. To make these patterns, I'd draw out the character on a large piece of paper and the cut out the shape in the pieces I would need to create and applique. I'd often keep the original and make a template in case I wanted to make another blanket in the future, I wouldn't need to make another template.

The planning stage!

This week I finished an applique project that has been sitting in a box here in Canada not doing much of anything while I've been abroad. I started this project one summer when I was home from the Emirates, and snapped a picture of the planning stage so I would remember what I had planned to do when I had the time to take it out again. (This is always the messy fun part, throwing fabrics around on the floor to find the best possible match of colours!)

Fusable hemtape and the underside of the olive Long Life/harmony appliqued design.

This design appealed to me because it's not just long life, but you can see two ancient 'swastika's' incorporated into the design. In The word swastika is derived from the Sanskrit word svastika, meaning any lucky or auspicious object, and in particular a mark made on persons and things to denote good luck. It is composed of su- meaning "good, well" and asti "to be" svasti thus means "well-being." The suffix -ka either forms a diminutive or intensifies the verbal meaning, and svastika might thus be translated literally as "that which is associated with well-being," corresponding to "lucky charm" or "thing that is auspicious".

The beaded trim I bought in Istanbul last year. You can see the detail of the hand sewn stitching between the strands.

The finished front! As it's winter and the light isn't very good inside, I actually laid this on the snow for a perfectly white backdrop!

And the back!

I know it seems crazy to have sewn all of these blankets by hand, but I actually enjoy the meditative repetition of hand sewing, and the simplicity that all of this can be created with a needle, some thread, some material, an iron, some trim and some fusible hem-tape, and above all, time. It was made while watching movies, or watching TV, or listening to the radio. I admit I'm not a very good TV watcher. I don't like to sit still for too long without having something to keep my hands busy!

Next up! Embroidery!

xxMelanie

Wednesday, December 15, 2010

Merry Christmas! Sugar High!

Happy, happy Christmas, that can win us back to the delusions of our childhood days, recall to the old man the pleasures of his youth, and transport the traveler back to his own fireside and quiet home!
~Charles Dickens

Christmas Cookie making! Baked, iced and fretted over by me!

This Christmas is slightly bitter sweet for me. Although I'm home with my parents after spending many years abroad, my sister is not here and it's hard to forget that there is a family member missing in all things that we do.

Family secret: My Dad and sister are Christmas Nazis. The tree must be perfect! The lights must be perfect! The christmas balls must not be near another of it's colour and I swear when my mother and I aren't looking they are on their hands and knees measuring the distance between the lights with Christmas rulers. If you don't believe me, Let me let you in on a Mehrer tradition- get a tree, set it up and walk around it 360 degrees. cut branches out of crowded areas, and drill new holes and insert said branches into the blank areas. And once the tree is full of decorations, you must have one person stand on the street and use hand signals to tell the other to fix the bits of the tree that might not look perfect to people walking by. So taking on the Christmas traditions was a daunting task that's been passed on to me this year.
Blinded by the light of Christmas.

Luckily, I passed tree decorating with flying colours, literally. In fact, after I had arranged the lights we had, with dad's blessing, I went to town in the truck and bought 300 more blinking mini lights. Our tree would blind regular Las Vegas Gamblers! My mother, of course, is wondering how much electricity we are spending with our stupendously blingy tree, so dad told her to go out and check the electricity metre. "It's probably whizzing so fast you could use it as a fan if you get too hot!" he said.

Gotta love my Dad.

Christmas cookie plate! How Festive!

Anyway, the next daunting task was baking. My sister is the baker in the family. She is also the decorator. I have piped cookies with her before, but under stern direction. so here you are Rene, not only did I bake these cookies, but I iced them myself! And it took me hours. Now I feel like a little Christmas elf sweat factory worker. but if you'd seen the cookies my sister made last year, where the guests refused to eat them, but rather wrapped them up in little napkins to take home and admire, you know I had lots to live up to. So here they are!

(And yes, Nae, you were greatly missed during the piping of these cookies. And the tree decorating. And all that will come in the next week to come! And FYI, there is no WAY I am going to make a gingerbread house!)

I kind of got into the snow flakes. They were really hard to screw up, so we have a plethora of them in many shapes and sizes.

These ones weren't easy to arrange on the baking pan, so they are slightly skewed. But as my art teacher once said,"never strive to make anything perfect otherwise you erase the idea that it was handmade." I agree! (Design of the two nicer looking cookies stolen from Rene's cookies from last year.)

Wonky Who trees. (I love Grinchy green!)

Cookies of the bells.

Snowflake Christmas tree!
Shockingly, there is still icing left over! What to do with all that icing?
Dad says make more cookies!!!

Merry Christmas!
xxMelanie

Monday, December 6, 2010

The Colours of Granville Island!

"Sometimes it's important to work for that pot of gold. But other times it's essential to take time off and to make sure that your most important decision is the day simply consists of choosing which colour to slide down on the rainbow."

~Douglas Pagels

A few weeks ago I was asked to chaperone a high school Home Economics class on their field trip to Granville Island in the heart of Vancouver. Why not? If I'm considering teaching high school it might be a good experience to hang out with some high schoolers once in a while.

I met them and their teacher at their school in the morning and we caught the local transit down to the Island for an exercise in pricing all the produce for sale in the Market. While the students got busy with their handouts, I wandered around the market (Supervising, of course!) and decided to record all of colour of the market. (I should note it was a dreary, slushy day outside, so maybe my appreciation of the colour was a little bit enhanced!

I should note the students had 45 minutes to complete their task. I stood in line for 15 minutes for a coffee and went to the bathroom as well. Okay, Okay, and I zipped off to Maiwa Art and Textile Supplies to do some drooling. So I'd say I had 25 minutes of wandering the market looking for colours.

All in all a good day, and a good experience. The high schoolers were a really nice group and no trouble at all. May I be so lucky in my future classes! Here are the colours I recorded that dreary day.

RED

Pink

Orange

Yellow

Ochre

Green

Blue

Purple

Brown

Black

White

Grey, Grey, Vancouver.
xxMelanie

Friday, December 3, 2010

The Last Experiment of the Term: Silk Painting!

The Painter on Silk
There was a man
Who made his living
By painting roses
upon silk.
He sat in an upper chamber
and painted,
And the noises of the street
meant nothing to him.
When he heard bugles and fifes and drums
He thought of red, and yellow and white roses
Bursting in the sunshine,
And smiled as he worked.
He thought only of roses,
and of silk.
When he could get no more silk,
He stopped painting
and only thought
of roses.
The day the conquerors entered the city
The old man
Lay dying.
He heard the bugles and the drums,
And wished he could paint the roses,
Bursting into sound.

~Amy Lowell

The last experiment in textiles for this term was silk painting, and it took us two weeks to complete it. One week to apply the cold beeswax paste, let it dry, and another week to apply the silk dye. It isn't really that difficult to do, you just need the right supplies.

Stretching the silk onto the stretcher- much easier with four hands!
First, we were given silk and stretchers in order to create our working surface. First, we wet the silk with water to make it easier to stretch. We then attached the silk to the frame by stretching in and securing it with thumbs tacks. It's important not to line the tacks up across from each other but to skew them so the result is even tension across the surface of the silk. It's not as easy as it looks and I had to redo mine.

Tacking up the silk.
Next, we took a bottle of emulsified wax, put it in a little squeeze bottle that had a metal nib on it and we began drawing our image, making sure all of the lines joined up in order to create an area of silk that the very runny dye could be spread and contained.

My drawing!

Our instructor told us she used to use hot beeswax in the classroom until someone tripped over the cord of the electric frying pan and sent the wax sailing. Though it smelled beautiful in there for months, it was such a safety hazard with the slippery floor, the students couldn't wear their shoes in the classroom for months! (Socks are less slippery on well-waxed linoleum!) So we used cold wax (and it certainly didn't smell as nice as the real stuff!)

My drawing placed under the silk as a guide.

Emulsified wax applied!

Then we let it dry for a week.

After a week, we began painting our image.

Our instructor showing us how it's done.

So here is mine once I had carefully painted in my areas. If you were careless with the brush, a spot might find itself in another area of colour you hadn't anticipated, so I learned that if you quickly scrubbed it out with a paint brush, you could stop those specks from spreading. I was also lucky with this design because I didn't have any huge expanses of areas that needed a wash of colour. It's important to paint quickly with silk paints as they can leave drags of colour if you aren't quick enough.

All ready to dry and have the wax removed!

And when I left it in the studio that night to dry, it was as perfect as it was ever going to be. So imagine my dismay when I arrived the next day to pick it up, to find someone a little less careful had splattered my little mosque with tonnes of splatters! I suppose this is one of the hazards of sharing studio space. Boo!

Ufff! Splotchy!!! Someone lost some karma points.
It might have been me with the torrent of swear words that followed discovering my speckled mosque!

Harumph!

Anyway, I brought it home and gave it a good iron between sheets of newsprint. The newsprint soaked up the extra wax but didn't transfer ink like using newspaper would have done. I know there are fancy ways of removing wax by steaming but truthfully, I was looking at this as a dud and just decided to get the wax off the quickest way possible.

Goodbye silk painting, and goodbye Vancouver for the holidays! I'm at the Naramata Artisan Faire this weekend and then it is full steam ahead on some painting.

and I've got some new ideas!
xxMelanie